NextDNS Support in YogaDNS

YogaDNS features built-in support for NextDNS (nextdns.io). It works over the DNS over HTTPS protocol and provides a friendly user interface and customizations including configuration ID, device name, and others.

First Start Wizard

The First Start Wizard makes it easy to add a NextDNS server to YogaDNS. It launches automatically upon the first start-up of a newly installed YogaDNS. Alternatively, you can launch the Wizard using the Configuration->First Start Wizard menu command.

  1. At the first screen, select the Use NextDNS server for all queries option and click the Next button.
    First Start Wizard 1
  2. Next, enter your NextDNS Configuration ID and click the Next button. You can get the ID at my.nextdns.io/start.
    You can also specify an optional Device name to be able to identify your device in Analytics and Logs at the NextDNS web control panel. Check Use current to automatically populate this field.
    First Start Wizard 2
  3. YogaDNS will check the server and display the result along with the round-trip time (RTT). Click the Next button.
    First Start Wizard 3
  4. You are now ready to work with YogaDNS. All DNS queries will be processed by NextDNS.
    Wizard OK

Adding a NextDNS server manually

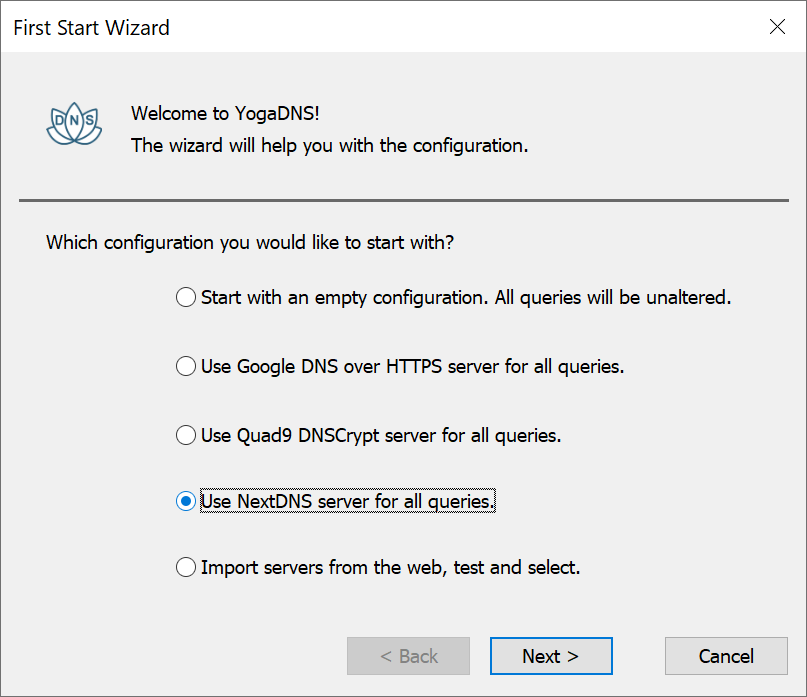
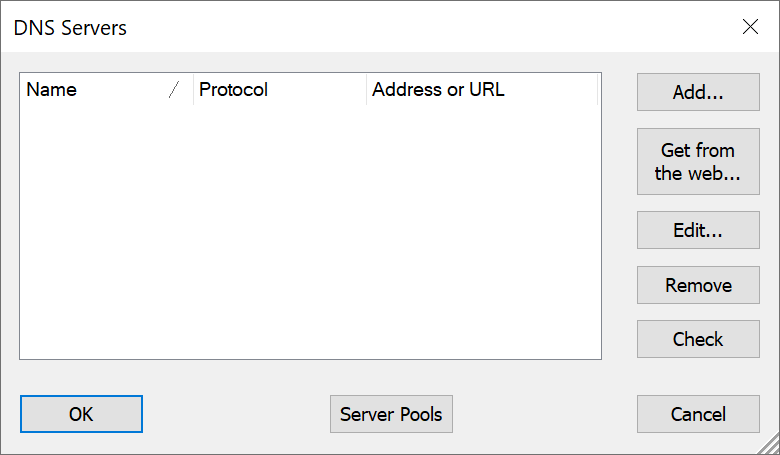
You can manually add a NextDNS server to an existing or new configuration of YogaDNS at any time.
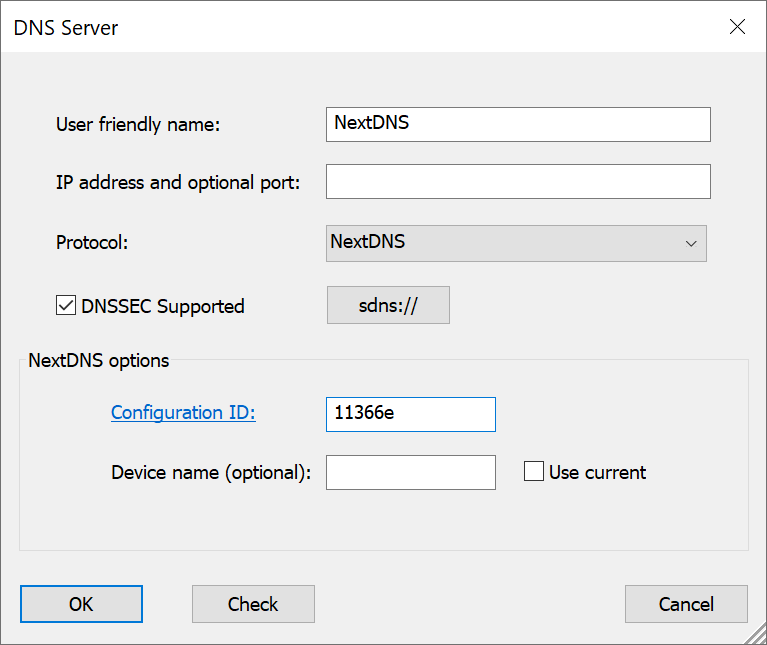
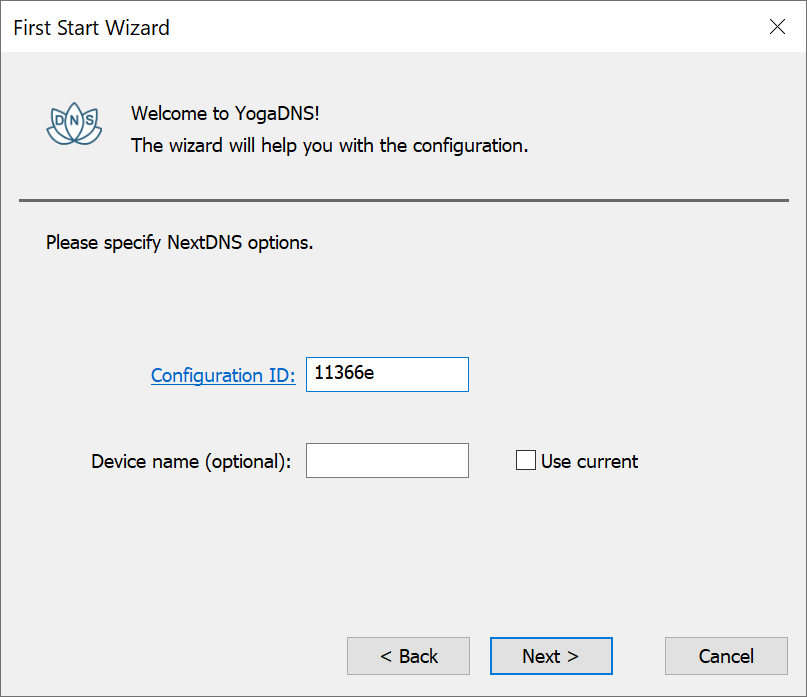
  1. To manage the list of DNS servers used by YogaDNS, open Configuration->DNS Servers via the menu or the toolbar icon. By default, the list is empty, and the window appears as shown below.
    DNS Server List
  2. Click the Add... button, set Protocol to NextDNS, and enter your Configuration ID, which you can get at my.nextdns.io/start.
    NextDNS Server

    If you leave the IP address and optional port field blank, a built-in NextDNS IP address (45.90.28.0) will be used. You can also manually specify one of the other NextDNS IP addresses:
    Primary: 45.90.28.0, 2a07:a8c0::
    Secondary: 45.90.30.0, 2a07:a8c1::

    You can specify an optional
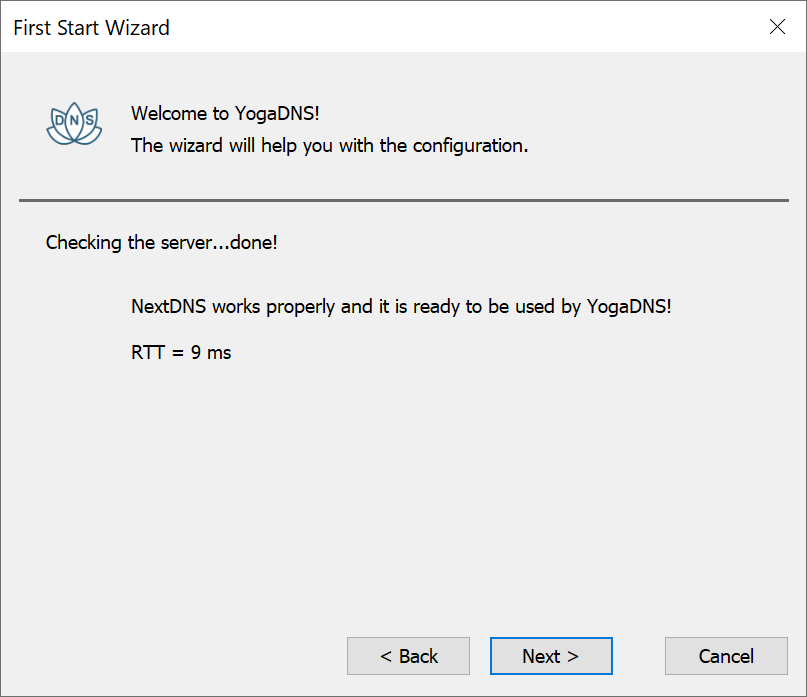
 Device name to be able to identify your device in Analytics and Logs at the NextDNS web control panel. Check Use current to populate this field automatically.

    You can use the Check button to make sure that the server works properly. Click the OK button to save the server. The server is now added to the YogaDNS configuration and will display in the server list.

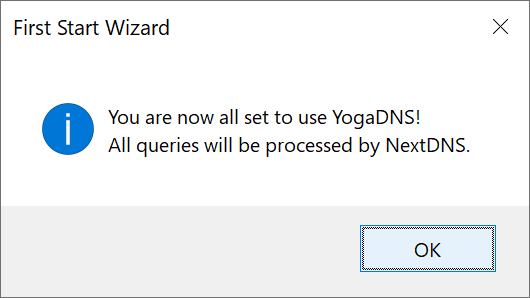
  3. After adding a NextDNS server, you need to assign it to a Rule. To do this, open Configuration >Rules via the menu or the toolbar icon. You can use the persistent Default rule. To open it, double-click on it or use the Edit... button. Alternatively, you can click Add... to create a new rule.

    The Default rule will be executed if no other rules match the resolution request. To make it work with NextDNS you need to select Action and DNS Server. An example of the Default rule is shown below. Default Rule
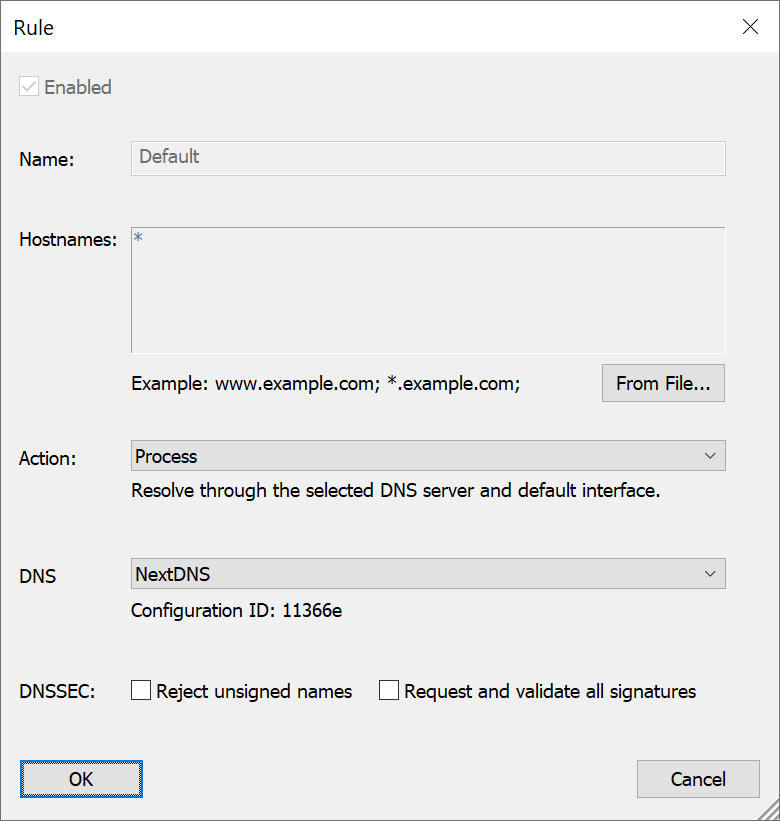
    It is possible to create multiple Rules to resolve particular hostnames through selected DNS servers.

When a resolution is processed by YogaDNS through a NextDNS server, you should see log messages like those below (set Screen Log to Verbose or Debug for more output).

[05.08 11:18:52] iana.org - request : type=A, server=10.0.0.1:53, program=nslookup.exe
[05.08 11:18:52] iana.org - process : server=NextDNS (NextDNS, 11366e), rule=Default
[05.08 11:18:52] iana.org - reply : type=A, ips=192.0.43.8
[05.08 11:18:53] iana.org - request : type=AAAA, server=10.0.0.1:53, program=nslookup.exe
[05.08 11:18:53] iana.org - process : server=NextDNS (NextDNS, 11366e), rule=Default
[05.08 11:18:53] iana.org - reply : type=AAAA, ips=2001:500:88:200::8